• Thursday, November 27th, 2008
Okay I can’t get enough of making daiza. It is just amazing to me to start with a block of wood and then transform it into a flowing piece of furniture. I just love it. Well I wanted to show how my last daiza turned out, and show what else I have been working on.
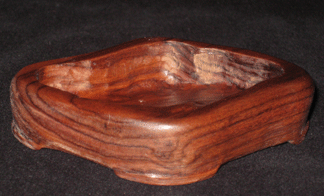
Here it is after a light coat of SPAR Urethane. It really brings out the beautiful color of the Bolivian Rosewood.
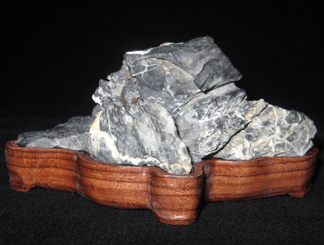
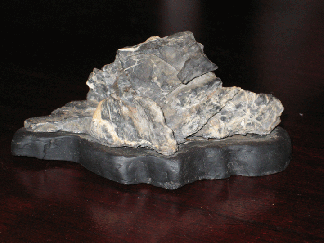
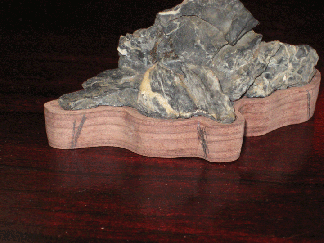
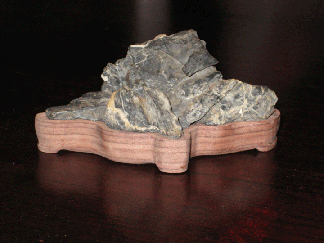
A member of the Central Florida Bonsai Club asked if I could make a daiza for one of his rocks. I of course agreed because I wanted to practice. This was a little more difficult because the bottom of the rock was not flat.
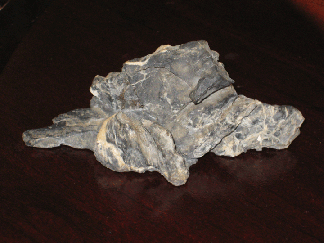
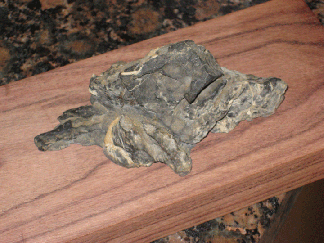
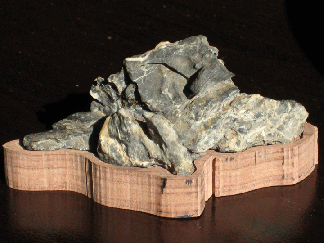
Sometimes I loose site of the daiza and just enjoy the entire Suiseki (rock & daiza). Here is close up of the daiza. Notice how much carving I had to do inside of it to get the rock to sit flat. Too bad this portion is covered, it is rarely ever seen.
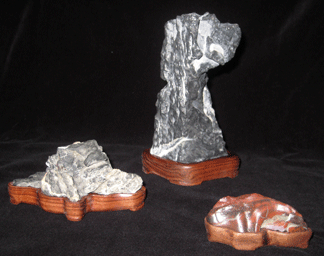
Here is the group of the daiza that I have made so far. They don’t take all that long to make, and are really enjoyable.

 Share on Facebook
• Sunday, October 26th, 2008
Last BSF Convention in Port Canaveral I sat in as a spectator for a Sean Smith daiza carving workshop. I’m glad I did. Sean is the highest recognized diaza artist outside of Japan and is respected for his work in Japan as well.
After the workshop I was very motivated to create one of these little stands and it turned out pretty good. So I decided to try another one. The following steps are what I followed to create one. I hope it inspires others out there to give it a try.
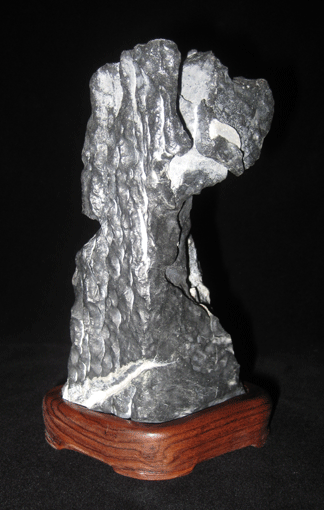
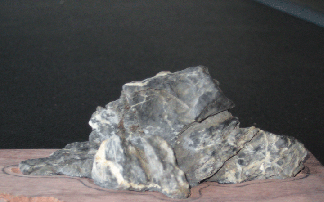
I bought a rock at the most recent CFBC meeting from a long time member, Marge Pierce. I didn’t like the stand, but the rock had potential. This is what it looked like when I bought it.
Here it is removed from the stand.
I used Rosewood for the daiza. This rock was an easy one because it had a flat base. So all you do is put it on the wood and trace around it.
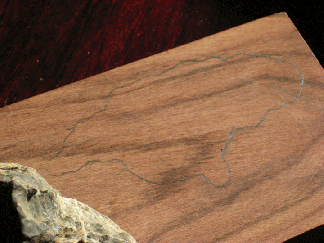
The outline of the rock
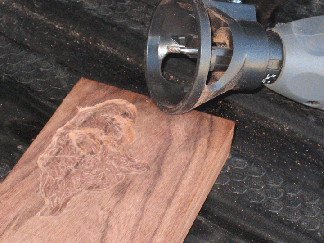
I use a dremel tool with a router attachment to remove the material about 1/8″. Just stay in the lines.
Now put the rock in its place and trace a line about 1/8″ around it to form the lip.
I used a jigsaw to cut out the diaza. Its starting to look good.
Now select the areas for the feet.
Here it is in its final form. It still needs a ton of sanding and handling to darken it up. That’s all there is to it. Give it a try
Share on Facebook